
Boosting Workplace Productivity with the Right Office Snack Machine
Learn how to optimize snack machines for offices to boost productivity, with tips on setup, stocking, and maintenance.
Why the Right Snack Machines for Offices Can Make or Break Your Breakroom
Choosing the right snack machines for offices is one of the most overlooked decisions a facility manager makes — yet it directly affects employee satisfaction, productivity, and daily morale. Here's a quick look at what matters most when evaluating your options:
Quick Answer: What to Look for in Office Snack Machines
| Factor | What to Consider |
|---|---|
| Machine type | Snack-only, beverage, combo, or multi-unit modular systems |
| Capacity | Match unit size to your headcount and breakroom footprint |
| Payment options | Coin, bill, credit card, NFC, or app-based contactless pay |
| Temperature control | Refrigerated units needed for drinks and fresh food |
| Power requirements | Dedicated 115V outlet; snack units draw ~100W, beverage units ~350W |
| Service model | Managed (no-cost) vs. self-operated equipment |
| Local support | Fast, accountable service vs. slow national vendor response |
If you're a facility manager dealing with a stale, poorly stocked machine and a national vendor who never picks up the phone — you already know the problem runs deeper than just snacks.
The right machine, properly configured and consistently stocked, keeps employees in the building, happy, and fueled throughout the day. The wrong one sits empty and becomes a frustration point you hear about in every team meeting.
I'm Manuel Mojica, founder of a 7-figure vending and micro-market operation based in San Antonio and the creator of Vending Circle — a nationwide community built by and for vending operators — and I've deployed snack machines for offices across hundreds of locations, learning what works and what quietly kills breakroom satisfaction. In the sections below, I'll walk you through everything from selecting the right equipment and configuring it correctly, to keeping it running smoothly long-term.
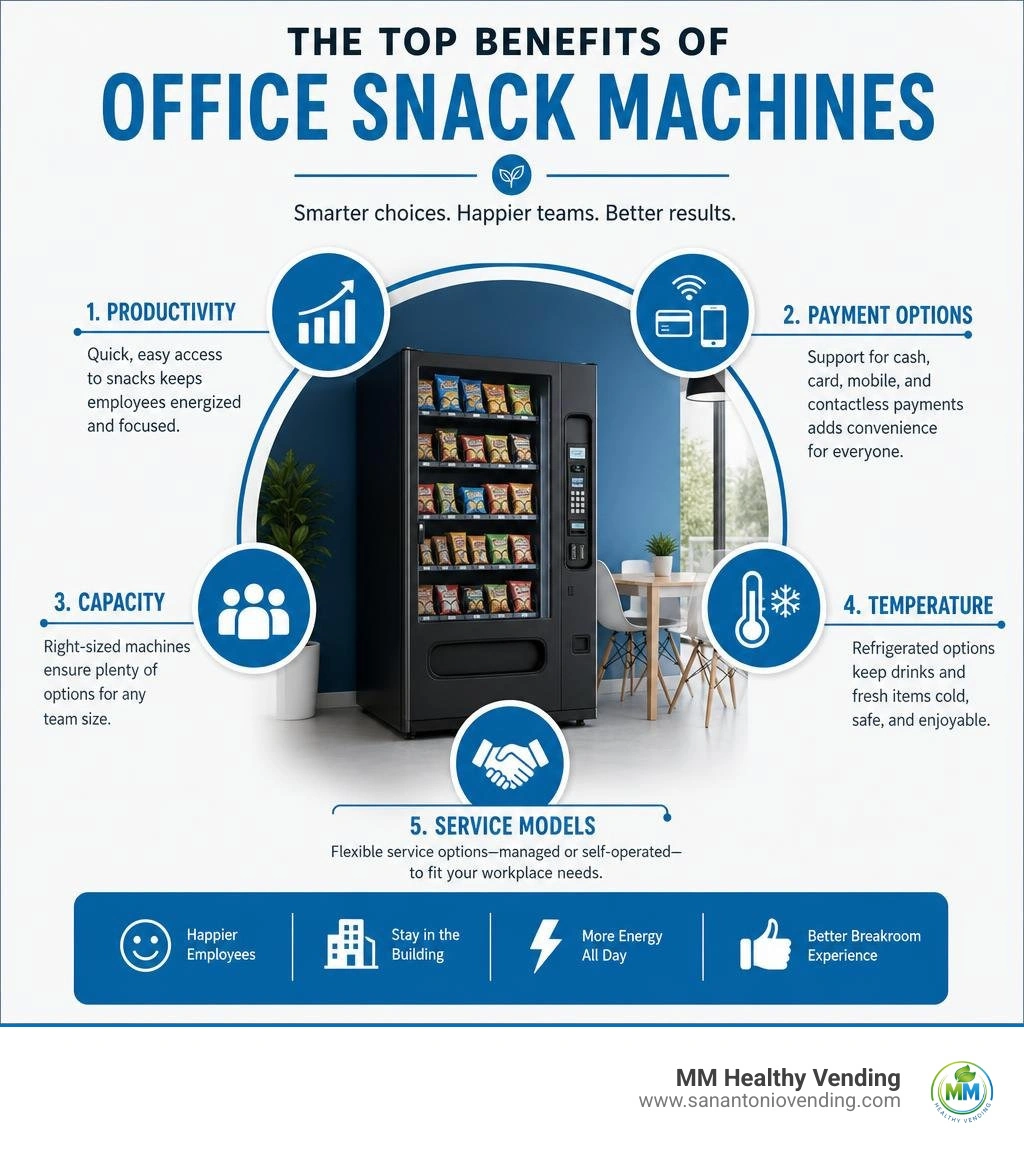
Selecting and Configuring Snack Machines for Offices
When designing an effective workplace refreshment setup, selecting the right machine layout is step number one. Today's commercial vending ecosystem offers a range of options, from compact single-cabinet setups to complete multi-unit modular banks that handle everything from fresh salads to cold sodas and chips.
Understanding how different cabinets integrate allows facility managers to optimize floor space while giving employees the variety they demand. For comprehensive setups, explore our Snack and Drink Machines guide and learn about tailored Workplace Refreshment Service options.
Physical Dimensions and Technical Specifications of Snack Machines for Offices
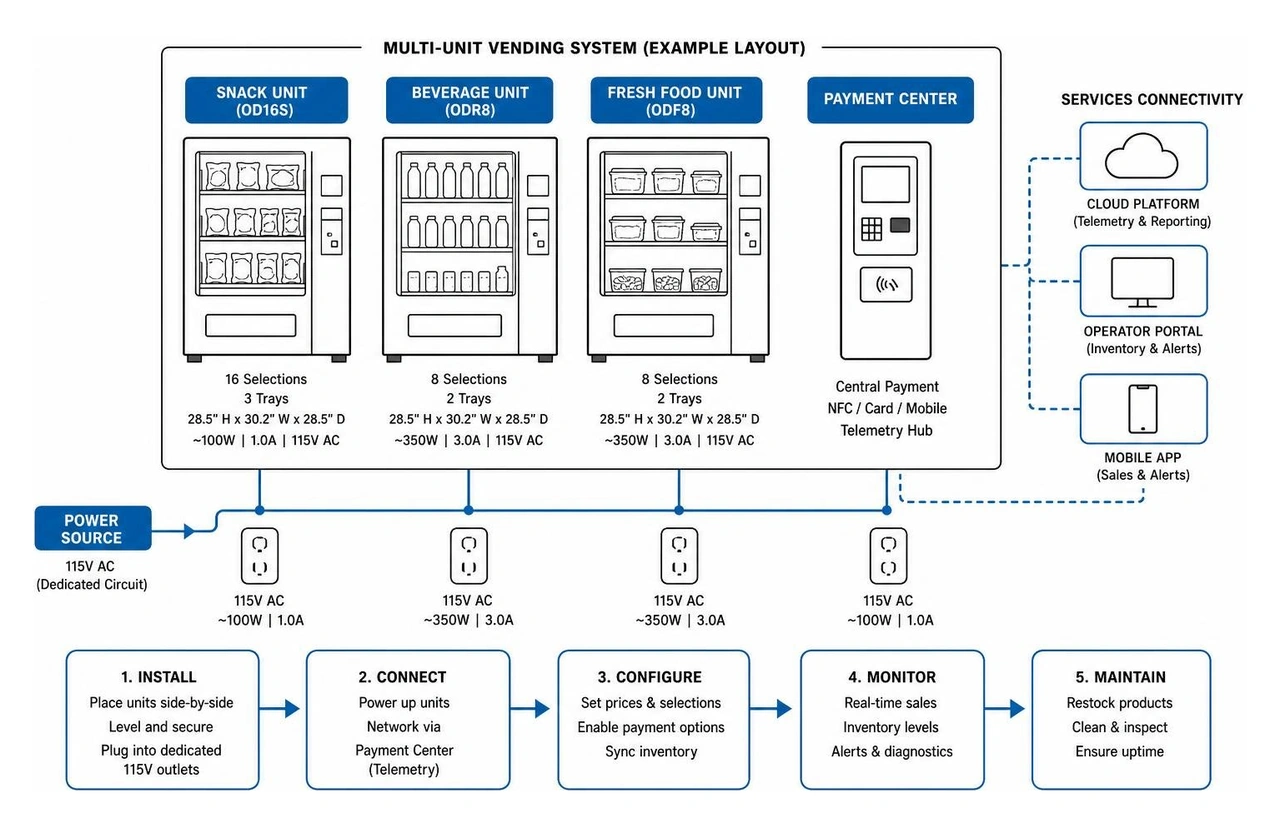
Modern snack machines for offices—such as modular systems like the Office Deli line—are designed to fit side-by-side cleanly. Understanding their physical dimensions, electrical draws, and climate requirements is essential before plugging anything in:
- Snack Unit (e.g., OD16S): Measures 28.5 inches high, 30.2 inches wide, and 28.5 inches deep. It features 16 total product selections across 3 trays. It draws approximately 100 watts (1.0 amp) at 115 volts AC.
- Beverage Unit (e.g., OD8RD): Measures 41 inches high, 30.2 inches wide, and 28.5 inches deep. It holds 8 total drink selections (6 gravity chutes for cans and 2 bottle columns). The unit draws 350 watts (3.8 amps) at 115 volts AC to run its internal refrigeration assembly.
- Entrée/Food Unit (e.g., OD14F): Designed for temperature-controlled food, providing 14 selections across 7 trays, operating at 100 watts (1.0 amp) at 115 volts AC.
| Cabinet Model | Width x Depth x Height | Selections | Electrical Draw | Operating Temp Range |
|---|---|---|---|---|
| Snack Unit (OD16S) | 30.2" W x 28.5" D x 28.5" H | 16 (3 Trays) | 115V AC, 100W, 1.0A | Ambient (Indoor) |
| Beverage Unit (OD8RD) | 30.2" W x 28.5" D x 41.0" H | 8 (6 Cans, 2 Bottles) | 115V AC, 350W, 3.8A | 37°F to 42°F |
| Entrée Unit (OD14F) | 30.2" W x 28.5" D x 28.5" H | 14 (7 Trays) | 115V AC, 100W, 1.0A | Temperature Controlled |
All units require indoor installation on a level floor. The ideal indoor environment operates around 75°F ambient temperature and 40% relative humidity. Placing refrigerated vending equipment near heating vents or in direct sunlight forces compressors to overwork, causing premature failure. Discover how proper configuration boosts overall efficiency in our guide to Maximizing Office Efficiency with Smart Convenience Solutions.
Installing and Coupling Multi-Unit Systems
When setting up multi-unit systems like the Office Deli, always perform the assembly with at least two people to avoid injury or equipment damage.
- Unpacking and Leveling: Transport each cabinet to its intended location. Adjust the leveling legs on the base of each cabinet to ensure even alignment across all units.
- Mechanical Coupling: Position the snack unit on top of or adjacent to the base modules according to manufacturer specifications. Secure the cabinets together using factory mounting brackets, bolts, and lock washers.
- Wiring Harness Connection: Pass the lower cabinet's communication and power wiring harnesses up through the cabinet access knockouts into the main controller cabinet. Plug these harnesses securely into the primary Vending Controller (VMC) board.
- Safety and Power Checks: Verify that all wiring routing is free from sharp metal edges. Plug the primary power cable into a dedicated 115V grounded wall outlet.
For more details on complete breakroom installations, check out our core Services and see how we implement Traditional Vending in commercial offices.
Stocking and Helix Coil Alignment for Peak Performance
A machine is only as good as its delivery mechanism. If a bag of chips gets hung up on a helix coil or a bottle fails to drop, your office productivity boost turns into customer service headaches. Proper stocking techniques ensure smooth dispensing every single time.
Optimizing Product Trays and Helix Coils in Snack Machines for Offices
In standard snack units, trays use spiral helix coils to push items forward into the drop chute:
- Top Trays (Wide Items): The top two trays are designated for wide items like potato chips, pretzels, and pastries. Ensure bags rest firmly flat on the bottom of the tray and are not caught on the edges of adjacent coils.
- Bottom Tray (Confectionery Items): The third tray features narrower coil spacing engineered specifically for single-serve candy bars, gum, and crackers.
- Coil & Divider Adjustment: If an item is too wide or hangs up, pull the tray forward on its sliding rails. Lift the tray harness release, unclip the helix pitch coupler, and adjust the horizontal tray dividers. Ensure the leading front end of the helix coil rests at the 6 o'clock position (pointing straight down) at the front lip of the tray to guarantee clean product release.
Proper product placement contributes directly to Boosting Employee Well-Being Effective Solutions across the workplace.
Beverage Chute Loading and Stock Rotation
Refrigerated drink units present unique stocking requirements:
- Gravity Chutes for Cans: Standard 12 oz cans roll down gravity-fed chutes. Ensure cans are positioned horizontally, straight, and smooth without resting at awkward angles.
- Bottle Columns: Standard 20 oz PET bottles sit upright or tilted in designated columns supported by rear guides. Adjust the depth retaining wall to match bottle height.
- FIFO Rotation: Gravity chutes do not naturally force First-In-First-Out (FIFO) stock movement—older cans at the bottom of the loading chute stay put while new cans roll over them. Manually unload and clear beverage columns every 30 days to rotate older inventory to the front.
- Refrigeration Specs: Factory settings maintain beverage temperatures between 37°F and 42°F using eco-friendly R134a refrigerant. Ensure rear clearance allows airflow across the compressor coils. For detailed technical diagrams on refrigeration systems, consult the official OFFICE DELI USER AND SERVICE MANUAL .
Learn more about managing beverage inventory with comprehensive Break Room Refreshment Services.
Programming, Payment Systems, and Machine Maintenance
Modern snack machines for offices rely on smart VMC logic boards that allow owners and facility managers to set individual item pricing, monitor sales audits, and diagnose hardware errors quickly.
Price Configuration, Payment Acceptors, and Test Vends
Entering the machine setup mode allows you to tailor prices and configure payment technology:
- Accessing Service Mode: Unlock the front cabinet door and press the designated
MENUSorSERVICEbutton located directly on the VMC circuit board. - Setting Prices: Navigate through the digital display to the pricing menu (
Pr). Pricing can be set individually per tray location or globally across all selections, with price points ranging from $0.00 up to $99.95. - Payment Acceptors:
- Bill Validators: Internal bill stackers usually hold up to 250 banknotes and accept $1, $5, and $10 bills.
- Coin Changers: Multi-tube coin changers process quarters, dimes, nickels, and modern Golden Dollar coins, storing them for automatic change delivery.
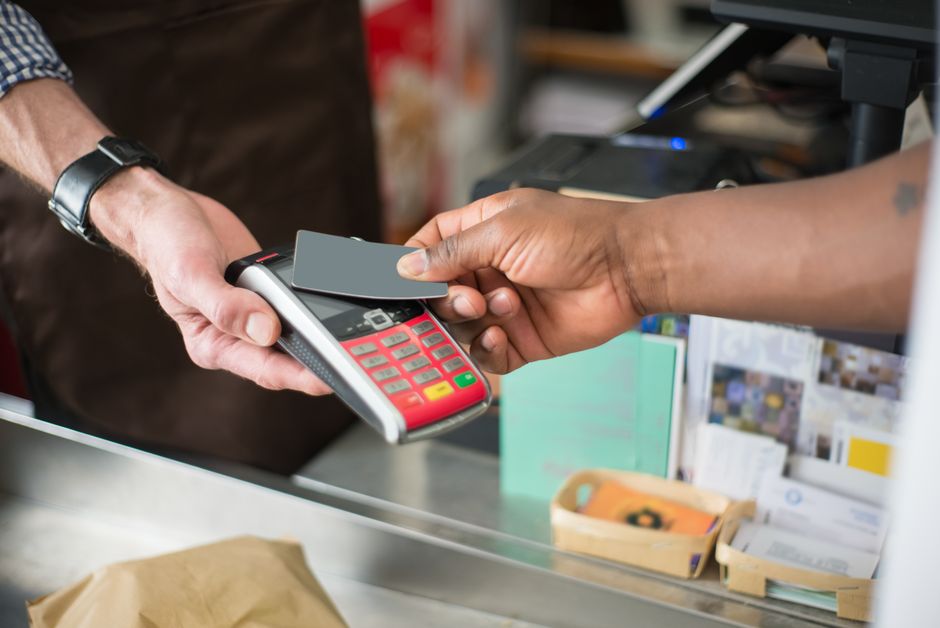
- Cashless & Credit Card Readers: Modern machines integrate telemetry devices accepting Apple Pay, Google Wallet, and contactless credit cards via cellular networks.
- Running Test Vends: Before closing up, run a test vend by selecting menu option
tE. Choose selection numbers to confirm helix coil motors rotate one full turn without taking money from the card reader or coin validator.
For localized options, see how we serve businesses with top-tier setups across San Antonio Vending Machines and specialized installations like our service in Schertz, TX - McKay's Monopoly - San Antonio Vending Services .
Preventive Maintenance and Troubleshooting Common Errors
To keep machines operating cleanly and avoid out-of-order calls, follow a systematic maintenance routine:
- Soft Errors vs. Hard Errors: Soft error codes (such as a single blocked motor) flag individual selections as "Sold Out" while keeping the rest of the machine active. Hard error codes (such as a main temperature sensor failure in refrigerated units) shut down vending completely until cleared in the menu.
- Coin & Bill Cleaning: Clean bill validator optical lenses monthly using alcohol wipes. Clear coin jam chutes by clearing bent coins or debris from the acceptor gate.
- Condenser & Fan Care: Dusty condenser coils on refrigerated units restrict heat transfer. Vacuum or brush the condenser fins and inspect the two continuously running internal evaporator fan motors quarterly.
For businesses looking for reliable local solutions, discover how our managed approach works across Vending Machines San Antonio and surrounding regional office parks.
Frequently Asked Questions
How do you program price settings and run test vends?
To program prices, open the main cabinet door to access the internal control panel and press the Service/Menu button on the VMC circuit board. Scroll to the price programming screen (Pr), enter the specific selection code (e.g., selection 11 or tray 1), and use the keypad to set your desired price between $0.00 and $99.95. To verify operation without spending money, select the test vend code tE in the menu and enter a selection number—the motor should complete a single 360-degree cycle.
What are the ideal environmental conditions for office vending machines?
Office snack and beverage machines perform best indoors within a climate-controlled room set to an ambient temperature of approximately 75°F (24°C) and a relative humidity of 40%. Keeping machines away from external doorways, unconditioned warehouses, or direct sunlight prevents refrigeration compressor overload and stops condensation build-up inside the glass frame.
How often should beverage columns and condenser coils be cleaned?
Beverage columns should be cleared and manually re-rotated every 30 days to prevent older bottom stock from remaining in gravity chutes indefinitely. Refrigeration condenser coils and fan blades should be vacuumed and dusted quarterly (every 3 months) to ensure efficient heat displacement and keep energy bills low.
Conclusion
Providing fresh snacks and ice-cold drinks directly in your office breakroom keeps your workforce energized, focused, and satisfied without leaving the facility. From understanding unit dimensions and power requirements to adjusting helix coils and maintaining payment acceptors, keeping equipment running smooth requires attention to detail.
At MM Healthy Vending, we eliminate all the maintenance hassle for business owners and office managers across San Antonio TX, New Braunfels TX, Boerne TX, Schertz TX, Seguin TX, Helotes TX, Alamo Heights TX, and Southside TX. We supply state-of-the-art snack machines, micro markets, and AI smart coolers at zero cost to your business. Our full-service program includes complete setup, routine inventory restocking, proactive preventive maintenance, and an industry-leading 2-hour local support response guarantee.
Ready to upgrade your breakroom without spending a dime? Explore our full range of solutions at San Antonio Workplace Refreshments or contact MM Healthy Vending today to get your free office vending machine installed!
You might also like...
More articles like the one you've read to keep you up-to-date on all things vending in San Antonio
Why San Antonio businesses choose us
Premium service, local expertise, cutting-edge technology
AI-powered smart coolers
Advanced computer vision technology for seamless, cashless transactions. Just grab what you need and go.
cashless
24/7 service
Round-the-clock support with an average 2-hour response time for any issues.
Local & trusted
Family-owned business proudly serving San Antonio since 2024
Ready to upgrade your breakroom?
Join hundreds of San Antonio businesses enjoying free, premium vending soutions